Collaborate on a project
Working on a branch
One of the most useful aspects of git is ‘branching’. This involves a few extra steps, but it enables some really important benefits:
Allows you to separate out work in progress from completed work. This means there is always a single ‘latest’ definitive working version of the code, that everyone agrees is the ‘master copy’.
Enables you and collaborators to work on the same project and files concurrently, resolving conflicts if you edit the same parts of the same files.
Enables you to coordinate work on several new features or bugs at once, keeping track of how the code has changed and why, and whether it’s been quality assured.
Creates intutitive, tagged ‘undo points’ which allow you to revert back to previous version of the project e.g. we may wish to revert to the exact code that was tagged ‘model run 2015Q1’.
We therefore highly recommend using branches. (Up until now, we’ve been working on a single branch called ‘master’.)
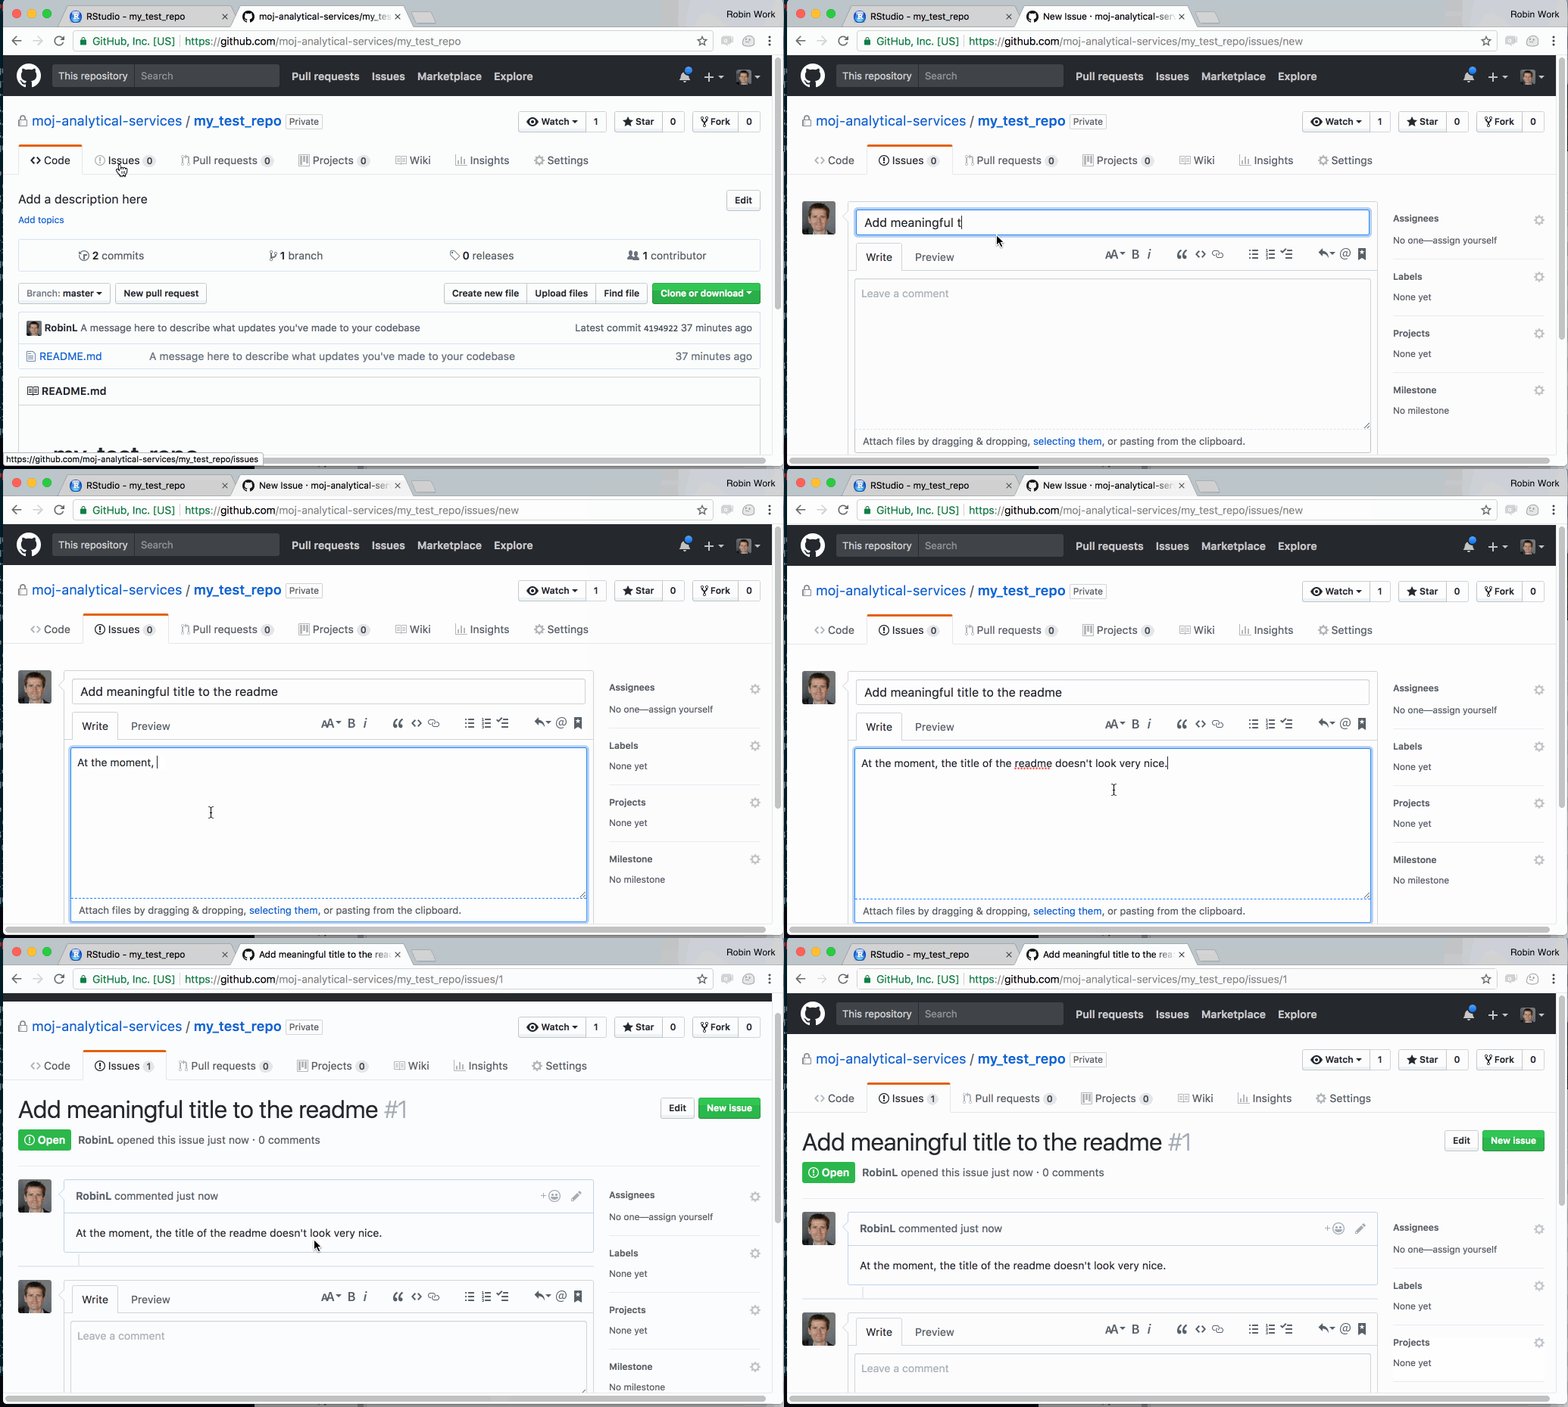
Step 1 (optional): Create an Issue in github that describes the piece of work you’re about to do (the purpose of the branch)
Github ‘issues’ are a central place to maintain a ‘to do’ list for a project, and to discuss them with your team. ‘Issues’ can be bug fixes (such as ‘fix divide by zero errors in output tables’), or features (e.g. ‘add a percentage change column to output table’), or anything else you want.
By using issues, you can keep track of who is working on what. If you use issues, you automatically preserve a record of why changes were made to code. So you can see when a line of code was last changed, and which issue it related to, and who wrote it.
Step 2: Create a new branch in R Studio and tell Github about its existence
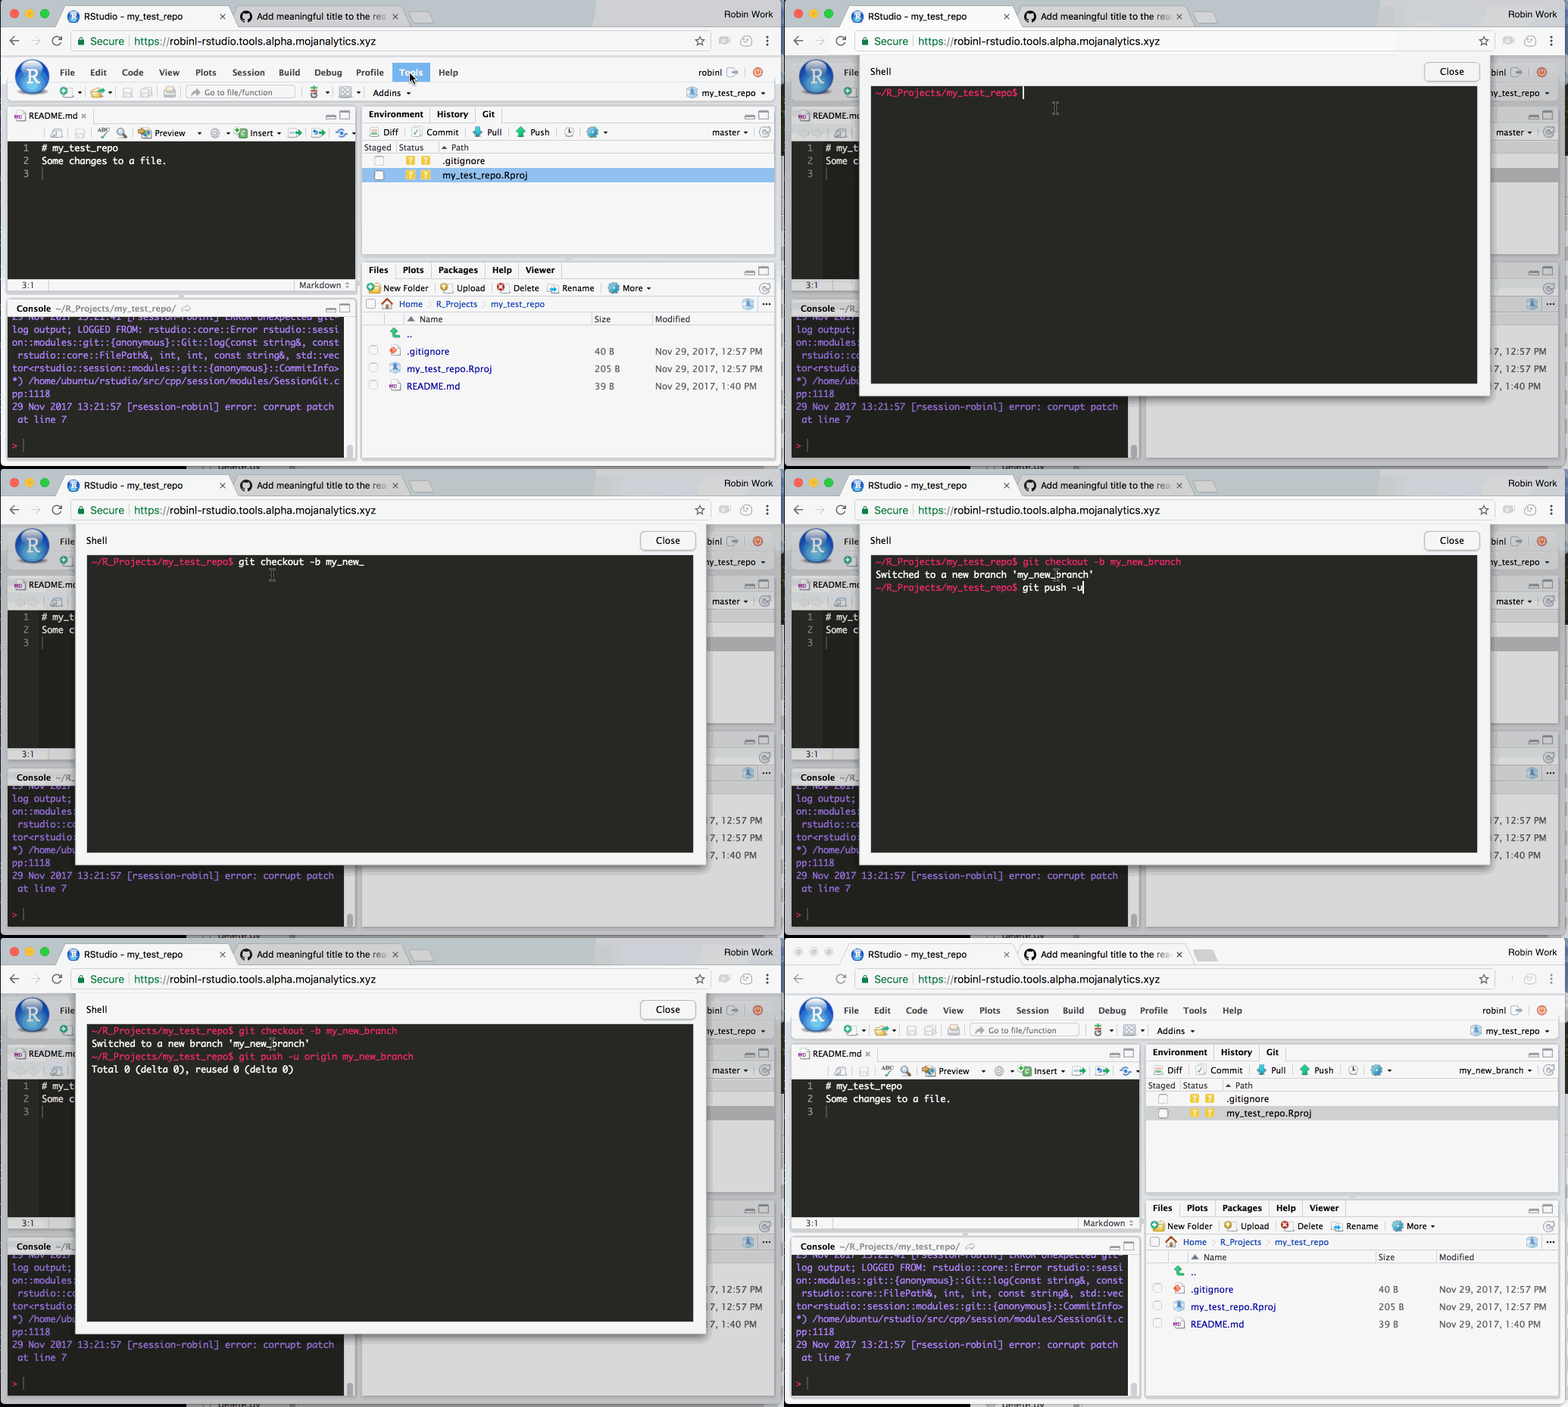
Create a branch with a name of your choosing. The branch is essentially a label for the segment of work you’re doing. If you’re working on an issue, it often makes sense to name the branch after the issue.
To create a branch, you need to enter the following two commands into the shell:
git checkout -b my_branch_name. Substitutemy_branch_namefor a name of your choosing. This command simultaneously creates the branch and switches to it, so you are immediately working on it.git push -u origin my_branch_name. This tells github.com about the existence of the new branch.
Step 3: Make some changes to address the Github issue, and push (sync) them with Github
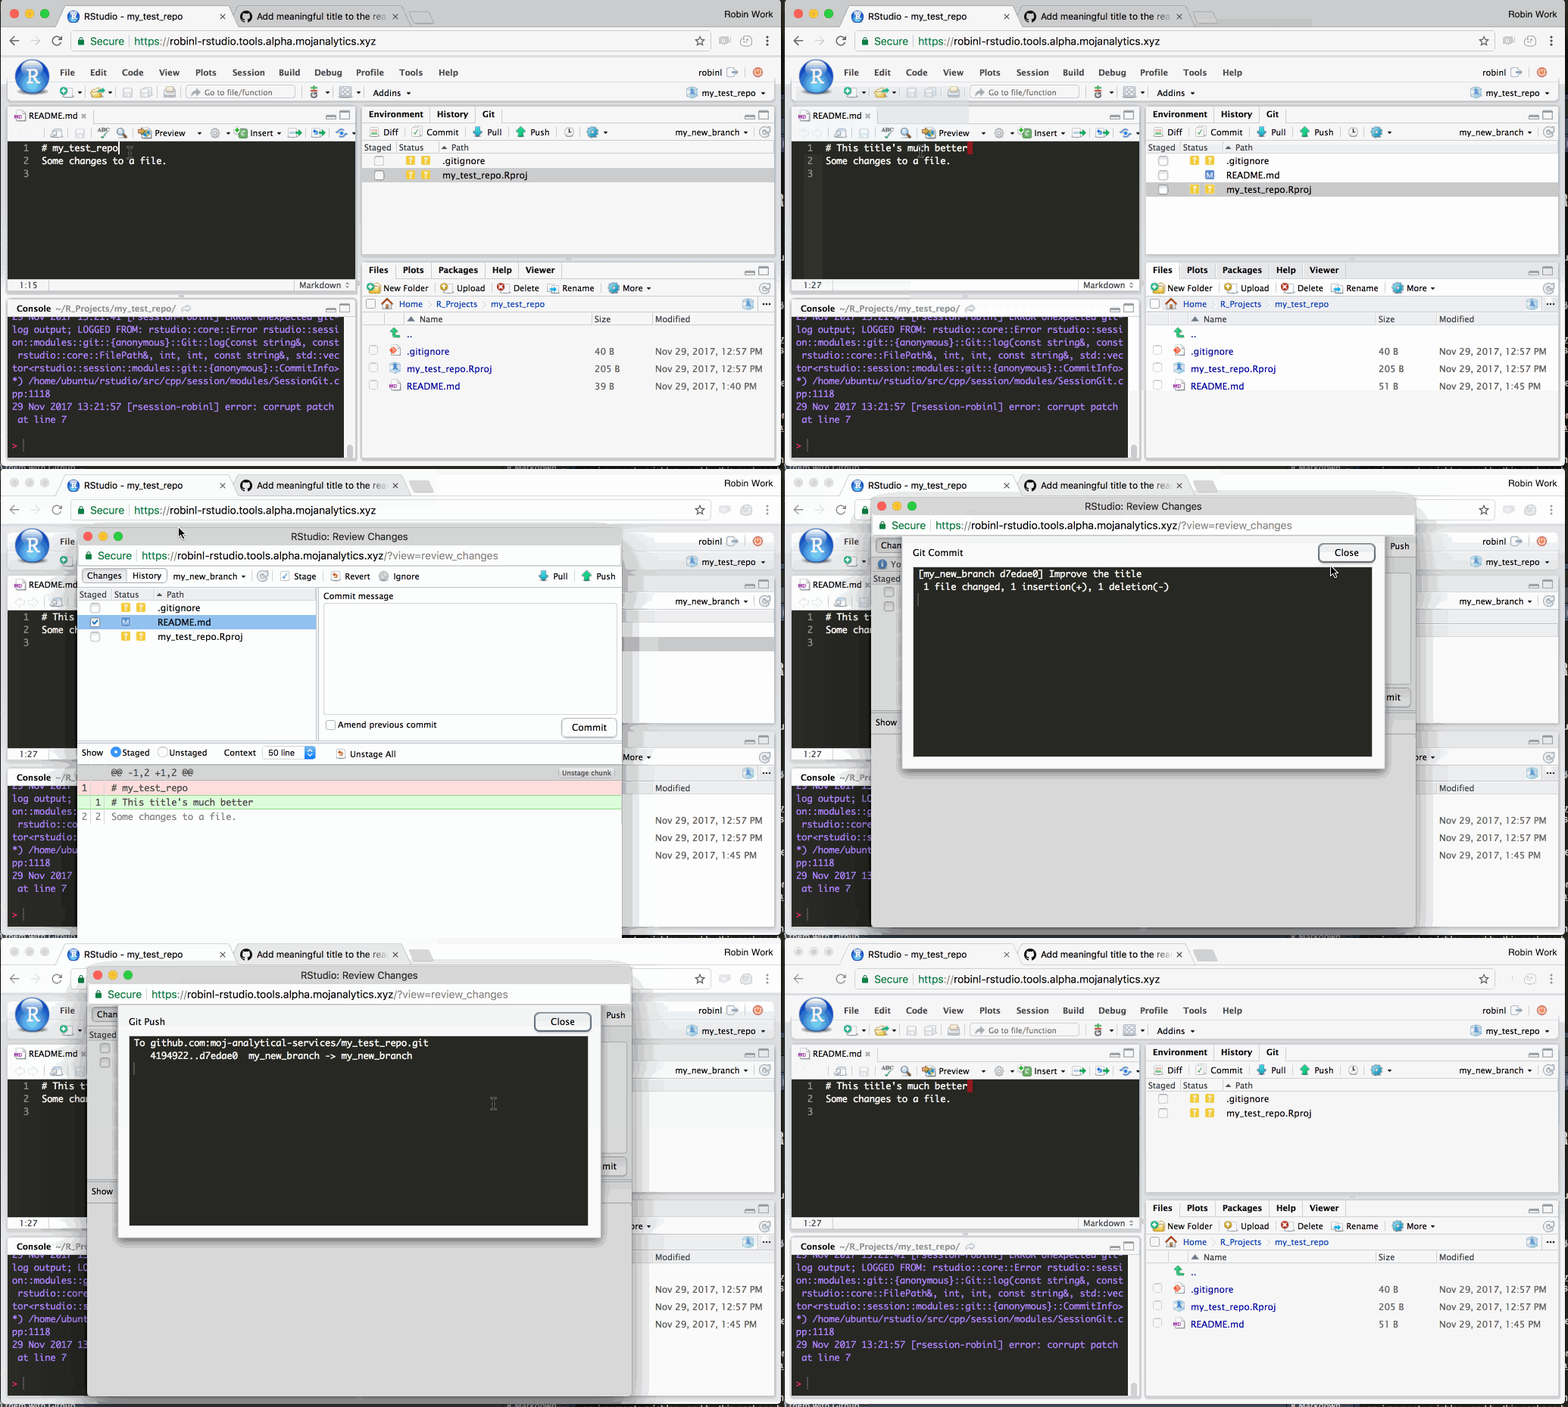
Make changes to the code, commit them, and push them to Github.
Step 4: View changes on Github and create pull request
You can now view the changes in Github.
Github recognises that you’ve synced some code on a branch, and asks you whether you want to merge these changes onto the main ‘master’ branch.
You merge the changes using something called a ‘pull request’. A ‘pull request’ is a set of suggested changes to your project. You can merge these changes in yourself, or you can ask another collaborator to review the changes.
One way of using this process is for quality assurance. For instance, a team may agree that each pull request must be reviewed by a second team member before it is merged. The code on the main ‘master’ branch is then considered to be quality assured at all times. Pull requests also allow you and others working on the project to leave comments and feedback about the code. You can also leave comments that reference issues on the issue log (by writing # followed by the issue number). For example you might comment saying “This pull request now fixes issue #102 and completes task #103”.
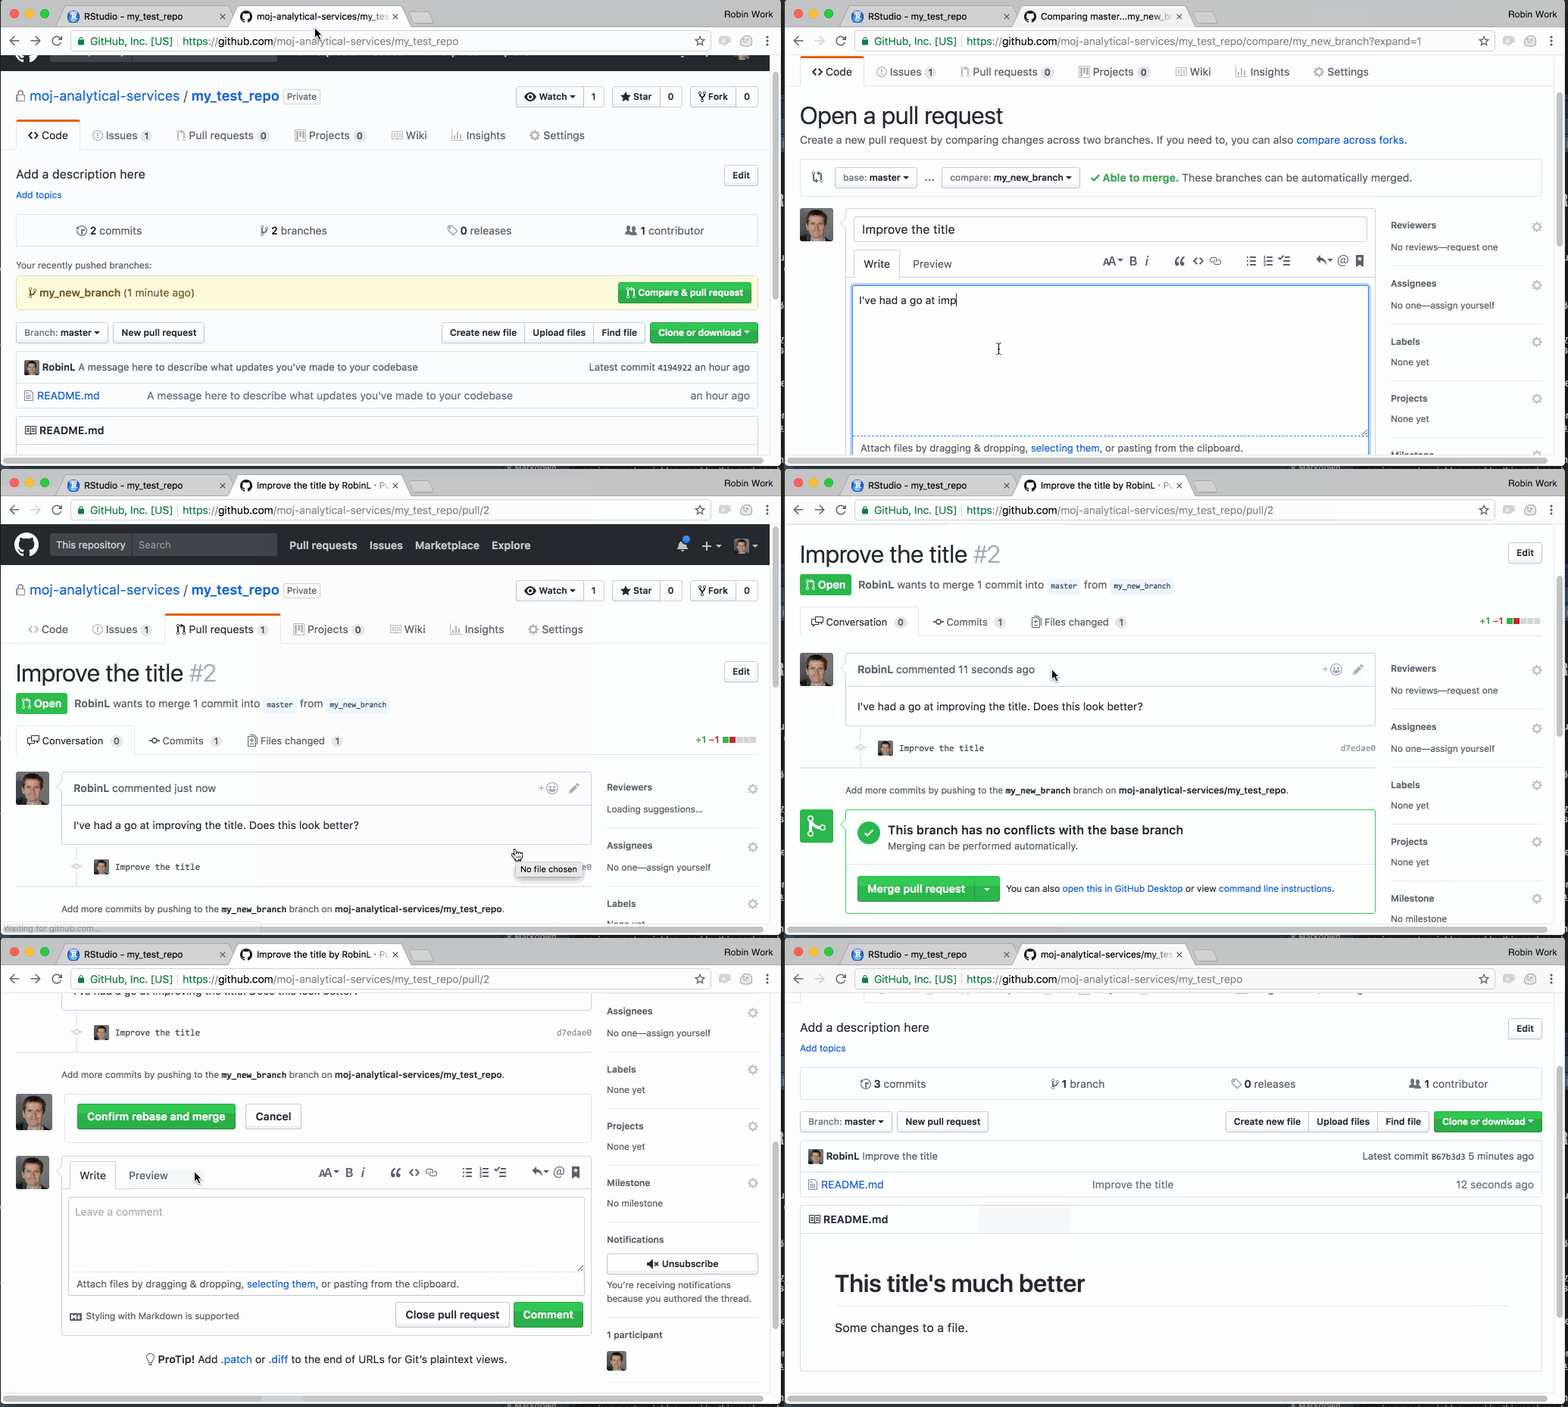
Step 5: Sync the changes you made on github.com with your local platform
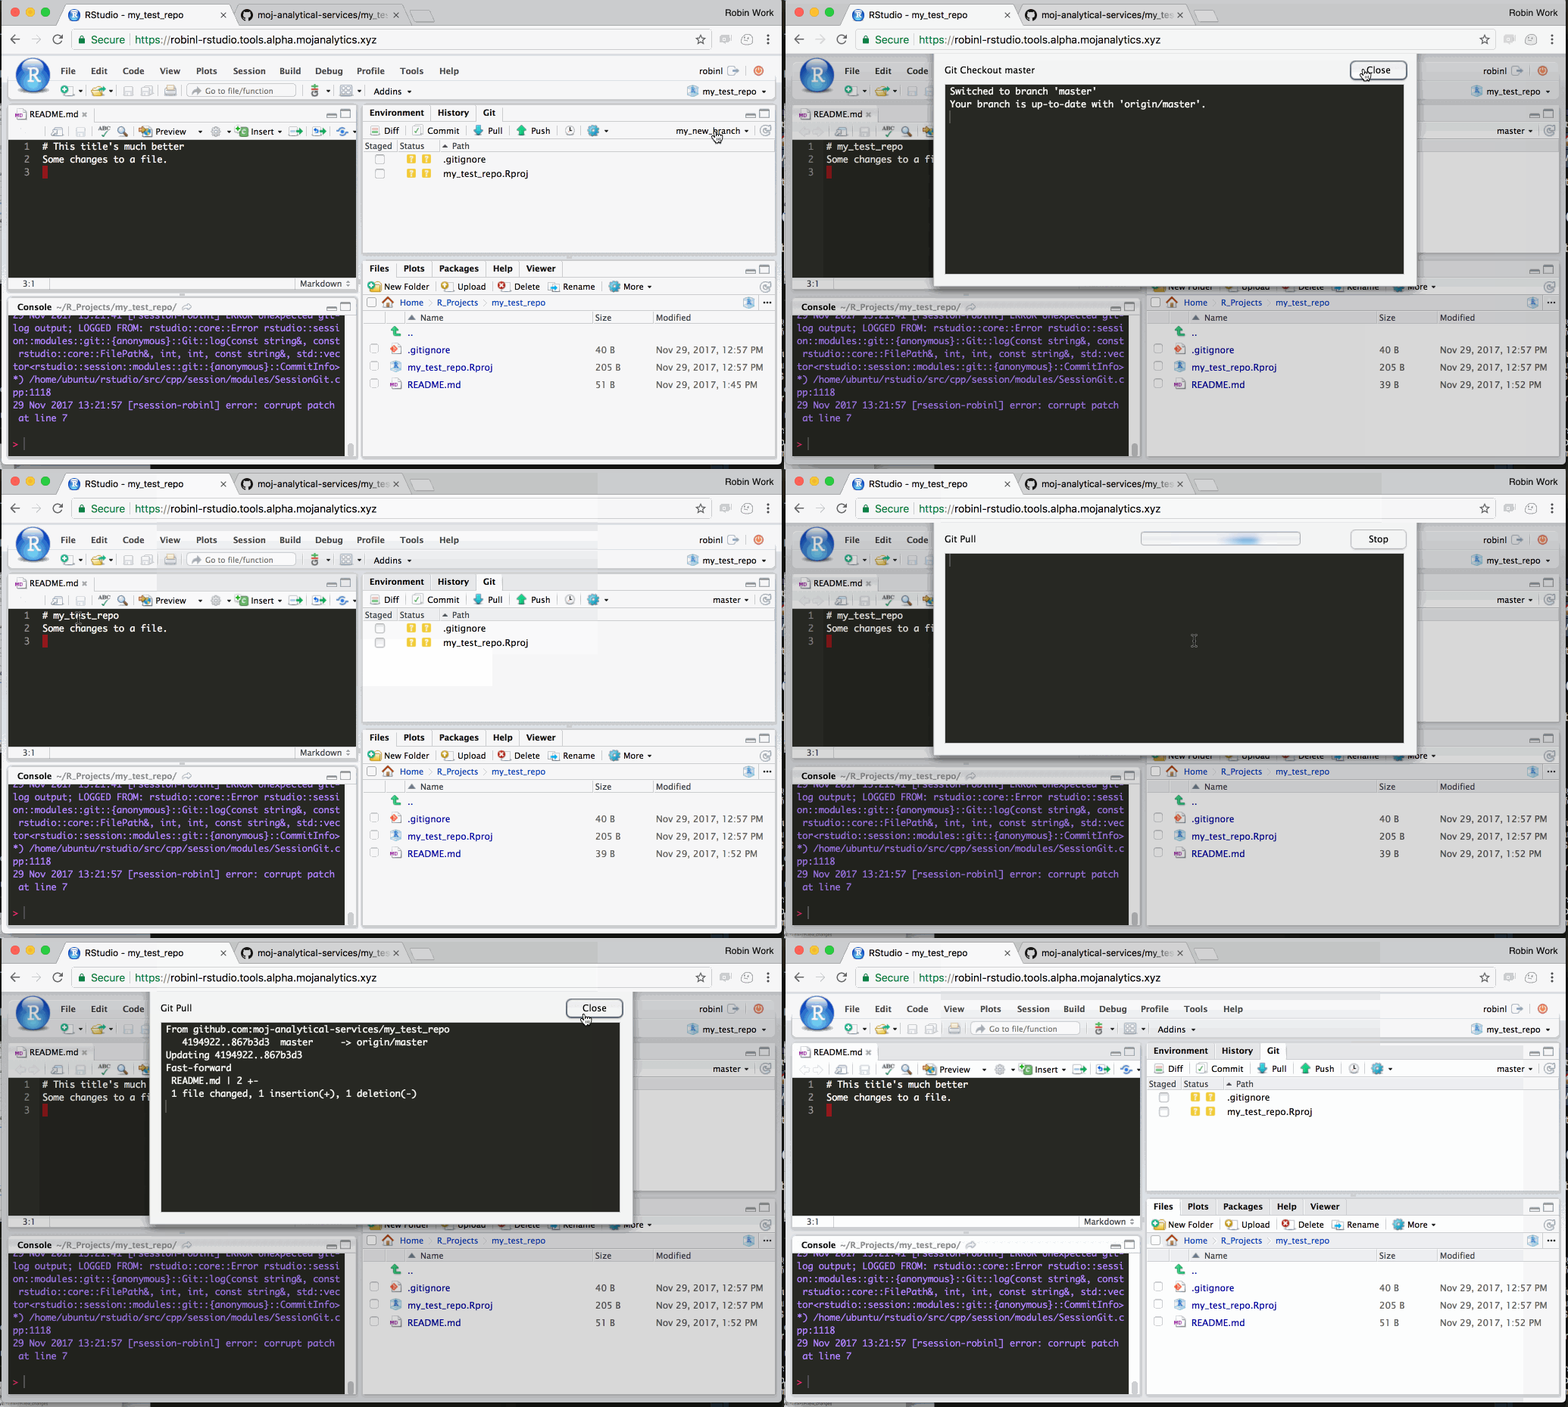
When you merged the pull request, you made changes to your files on Github. Your personal version of the project in your R Studio hasn’t changed, and is unaware of these changes.
The final step is therefore to switch back to the ‘master’ branch in R Studio, and ‘Pull’ the code. ‘Pulling’ makes R Studio check for changes on Github, and update your local files to incorporate any changes.
